Building the Bench & Laying the Track.
Building the bench can be as easy, or as complicated as you want it to be.
Benches can be custom built, or you can make use of an unused kitchen table or a shelf fixed to a wall.
The first thing to consider is how much weight the bench will carry, as that will determine how strong the construction needs to be.
If you are installing your bench against a wall you could use the wall as a support, which will save on construction costs.
You also need to be comfortable operating your model train layout. You should be able to easily reach every point of your layout.
There is nothing worse than trying to fix a problem in the center of your layout which you can’t reach!
Consider the height that you would like to operate your trains at.
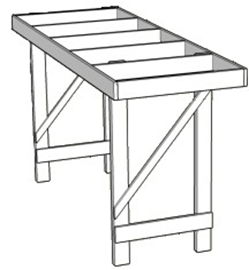
Figure 26
If you are planning a second level you may want to lower your bench height slightly. If you are getting the children involved, you may want to go lower again.
You could sit on a chair to operate the trains, while the kids stand, to get a height that suits both.
Some enthusiasts like running their trains at chest level so the children can’t get to them… there are many different options. Choose the one that best suits you.
The video below provides a great expandable option. Click the video image and allow the document to send you to the webpage with the video. This document will remain open.
A standard piece of ¼” plywood is 4 x 8 foot.
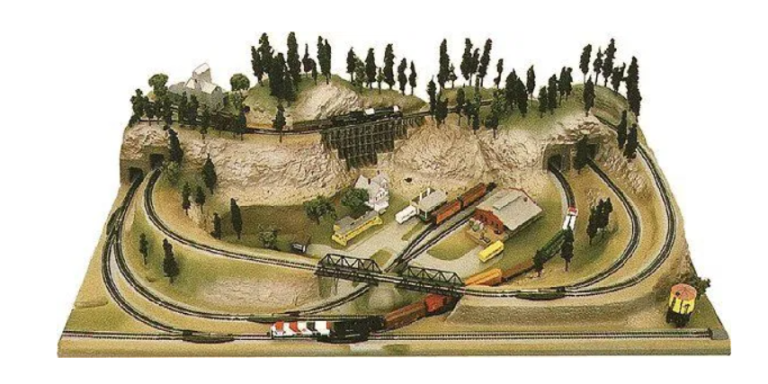
So it usually makes sense to build a bench that size. To increase the size of your layout you could create a second 4 x 8 foot bench and arrange the benches in an L shape.
By creating a third bench you can arrange all 3 benches in a U shape. The growth of your layout is only limited by your imagination.
Construction of the Bench
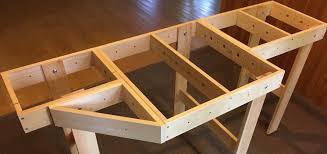
A bench is basically 4 legs with a top. The top is the ¼” plywood but because it is flimsy you need to create a base to support the plywood top. The diagram below shows how to construct a simple base from 1 x 4” lumbar. The plywood is then fixed to the top of the base.
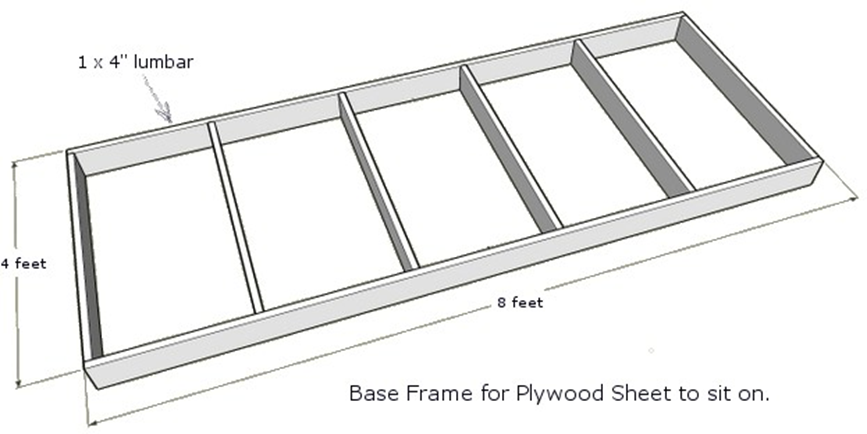
Figure 28
Most lumber yards will cut the lumbar to size for you. This saves you having to cut the lumbar at home.
You will need:
2 x lengths of 1 x 4” lumbar 8 feet long and
6 x lengths of 1 x 4” lumbar 3 feet 10 inches long.
The sections should be screwed and glued together rather than nailed. Nails tend to work loose with the vibration of the trains. Always drill pilot holes when screwing the lumbar together as this will stop the lumbar splitting.
When the glue is dry you can lay a sheet of 4 x 8 foot ¼” plywood on the top of your base. Make sure it lines up with your base all the way around and then screw the plywood sheet to your base.
I don’t recommend gluing the plywood sheet down as you may want to remove it later to change the track levels or build a pond.
You should now have a nicely support top to build your dream model train layout on… you just need some legs to get the top up to the level you require!
Remember the height of your bench is to suit your situation.
Most enthusiasts like their trains at chest level because they often look better when they are close to eye level, but this makes it hard to reach into the center, and impossible for children to see the trains.
A typical bench height for children would be 30 to 36 inches, but if you want to save your back, then you need to be higher than 42 inches.
It depends entirely on your own requirements… so decide and go for it!
The legs should be made from 2 x 4” lumbar split into 2 pieces of 2 x 2” lumbar at the length you decide on. You need 4 legs cut.
Turn your top upside down and glue and screw the legs just inside the side of your top and against the first cross section in from the end of the base.
Unlike a table where the legs are at the very corners of the top, your bench will have 1 section of overlap on each end. This provides a shorter and stronger top section between the legs.
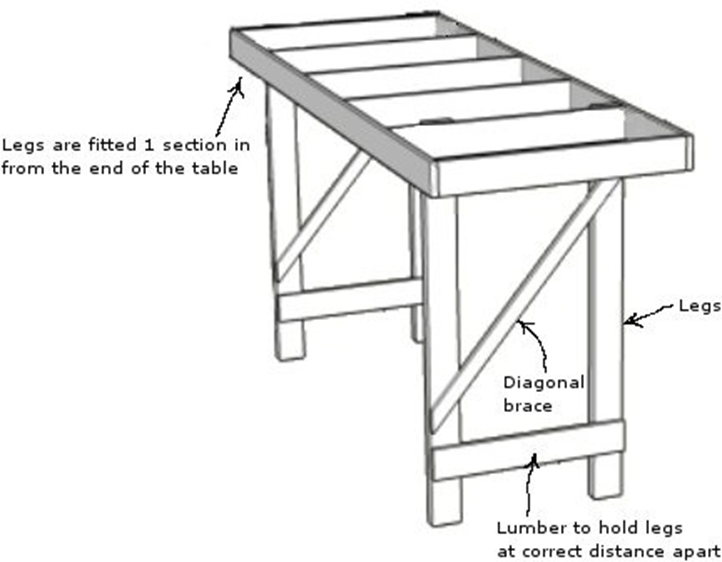
Figure 29
Now you need to brace your legs. About 6 inches from the end of your legs glue and screw a 3 feet 10 inch length of 1 x 4” lumber to hold your legs at the correct distance apart. The glue and screw a length of 1 x 2” lumber diagonally across the legs as shown in the diagram.
The bench shown has been made to sit against a wall and will be fixed with a few screws through the side of the top support and into the wall.
This stops any sideways movement of the bench. If you are not going to fit your bench against a wall you will need 4 extra braces which will go from about 1/3rd down the leg to the edge of the table. This will stop any sideways movement.
You now have a strong and steady bench upon which to build your dream model train layout.
Choosing and Laying the Track
Without any doubt the most important part of any dream model train layout is good track work.
Most beginners make the fatal mistake of not laying the track properly. It’s tempting to rush the process… the excitement of wanting to see the trains running takes over.
But, this usually ends up being problematic in the future.
Track Construction
The rails on model train tracks are usually made from one of these materials:
- Brass – gold color. Conducts well but needs constant cleaning because the brass oxidizes and the oxide is a poor conductor..
- Zinc coated steel – dull whitish gray color. The zinc coating will wear away and the steel tends to rust.
- Steel and nickel silver – color of a five-cent piece. Not as good a conductor as brass but the oxide conducts as well as nickel silver so you will get reliable operation. Enthusiasts favor nickel silver tracks.
Track comes in different lengths and shapes. The most common being the 9” long pieces of sectional track.
Two types of sectional track are available – the regular sectional track and the all-in-one track.
The disadvantage of creating your own roadbed is that any loose ballast can be sucked into the working parts of your train and damage them.
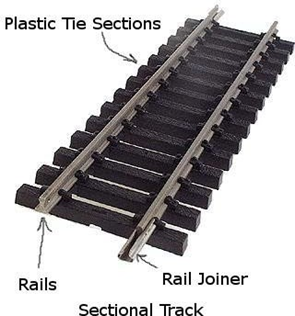
Figure 31
A good idea is to frequently vacuum your track to lift any loose ballast.
The advantage of all-in-one track is that you obviously don’t have to create the roadbed but it also means there is no problem of loose ballast being sucked into any working parts.
All-in-one track is great for temporary layouts however they can be a bit restrictive for larger
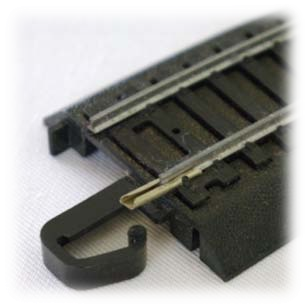
Figure 32
layouts as the same variety of sections is not as available as in standard sectional track.
The plastic roadbed joiners are sometimes different between manufacturers. If you choose the all-in-one track I would suggest sticking with one manufacturer to avoid the plastic clip problems.
Most brands of sectional track will fit together as they all have the same rail profile and use steel rail joiners.
A tip here is to make sure that the tracks join snugly and are aligned well. Bad connections on rail joiners will not conduct the electricity well and you will have a frustrating time to fix it.
Flexible track can be bought in bendable sections (about 3 feet long) and has many advantages over the 9” sectional track… the best being fewer joints on the run to cause electrical connectivity problems.
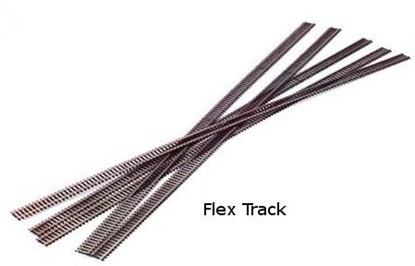
Figure 33
A 3 foot section of flex track will replace four 9” pieces of sectional track which removes 6 electrical connection points – a big plus for flex track.
Flexible track provides a more natural bend and should be used when you want to create curves which are different in radius from the standard curved sectional pieces. The trick is to make sure you don’t have any sudden kinks or bends or sudden ups and downs.
Flex track must be used smoothly. Look along the track with your eye and make sure there are no kinks or bumps. Starting into ascents or finishing descents can often create dips and bumps which will derail your trains.
Be careful not to make the flex track bends any tighter than the recommended minimum radius in the table on as posted further up. Tight bends are a common source of derailments, especially with longer trains.
The flexible track can also be cut down to size to use when the standard 9” section is just too short or too long.
Turnouts, which are sometimes known as switches, are made to match the radius and length of standard track sections. They are identified with a number like 4, 6 or 8 which details the size. The smaller the number the sharper the angle is of the turnout.
The most common turnout is a No. 4 which fits in the space of a standard 9” straight section. The No. 4 means the turn out moves 1 inch away for every 4 inches along the straight section. A No.6 moves out 1 inch for every 6 inches along the straight making it not as sharp as the No.4 turnout.
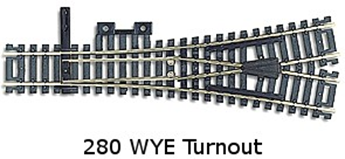
A turnout with no straight section but one leg goes to the left and the other to the right is called a wye turnout.
Turnouts are a working component so quality matters. The cheaper brands have a thin metal strip for the moveable point rail which will bend with use and could cause derailments. While they can be easily straightened, the better quality turnouts use points made from the same material as the rails. They will last as long as any other part of your track, and won’t require the same amount of maintenance as the cheaper brands.
Rules for laying Track
As I’ve said before a well laid track is imperative to ensure problem free operation of your dream model train layout. Here are the rules to laying track:
- Follow the minimum recommended radius for your scale mentioned in the table on page 9. The tighter the bend the shorter cars and locomotive you can run. Long cars will jump the track on a tight bend.
- Make sure you have a good firm connection on all rail joiners. Crimp them with a pair of long nose pliers if you have to. Sloppy connections will be a major source of frustration if you don’t crimp them.
- Check the top of your track joins by running your finger nail across the top feeling for a smooth and level transition.
- Nail down your track to your base using small tacks through the holes in the track tie sections. This will avoid rail joiners moving and coming loose when the trains run across them.
- Never force the sections. When you start creating different layouts you may need small sections to fill in the sections that don’t join naturally. Forcing them will stress the track which will result in a broken rail or a break in electrical connectivity on a rail joiner.
Ascents and Descents
Most people are limited to the space they have available for their model trains so building different levels is a great idea to get more track in the same space.
But remember that your locomotive with its freight or passenger cars needs to be able to climb the incline.
A good rule of thumb is a 3% climb or 3 inches up for every 100 inches along. This provides a natural looking climb that most locomotives with a reasonable train can handle.
I have heard of a 8% climb on a 4’x 8’ board, but only some locomotives made it to the top with their short trains.
Roadbed
In real railroads the roadbed is what the rail and ties sit on. This provides a solid bed of material for the railroad to sit on. It also raises the level of the rail.
In model trains we use roadbed for various reasons:
- To create a smooth surface to lay the track on. Often the plywood table top we build on is not smooth.
- To deaden the sound of the train.
- To raise the track.
- To make it look like the real thing.
They are easily installed by marking out the center line of your track on your main board. The cork roadbed comes in 2 pieces which are laid either side of the center line with a water based white glue.
Around bends you can hold the cork roadbed in place by using some temporarily placed pins.
You will need to trim the road bed where it meets on curves and turnouts. Keep the pieces as they are always handy to fill in small places.
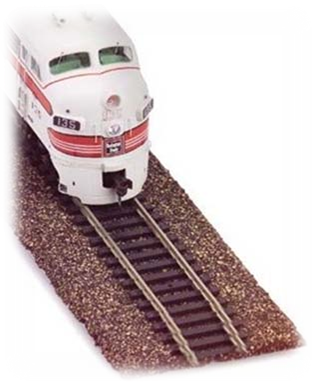
Figure 35
The track can then be installed on the roadbed and tacked down being careful not to compress the roadbed by tacking the track down too far. Using tacks in every 2nd hole will be enough to hold the track in place.
Check the turnouts for correct operation as the sliding mechanism could grab on the roadbed. Trimming out the culprit will solve this problem.
Check your track for level by looking along the length of track. Any dips or bumps can be leveled out by using some card stock.
Do not be concerned about how the roadbed looks when you start using card stock to level your track, as it will all be hidden with the fine sand (ballast). The fine sand represents the gravel on real railroads.